Plug in your camera and transfer photos to your Ordissimo - Tutorials Ordissimo (Ordissimo v4)

We're going to see how to plug in your camera and transfer the photos onto your Ordissimo. To do so, please follow the steps listed below...
1Connect the camera with a USB cable.
To begin, you'll need your camera and its USB connecting cable (generally provided with the camera). Plug your camera into your ordissimo's USB port using this cable.
You also have the option of removing the camera's SD memory card and sliding it directly into your Ordissimo's SD card reader (if it has one).
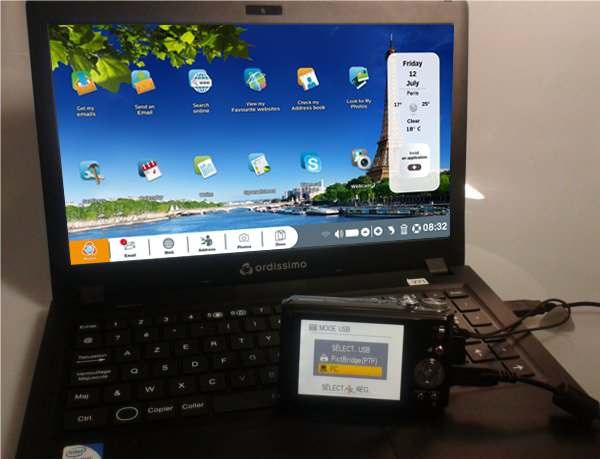
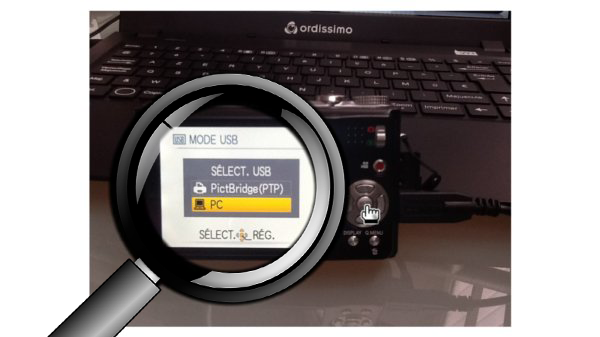
Turn on your camera. The two devices should connect automatically. Some cameras require confirmation before connecting to your Ordissimo. If this is the case, a window will appear on your camera screen at which time you should select "PC" to connect the device to your Ordissimo.
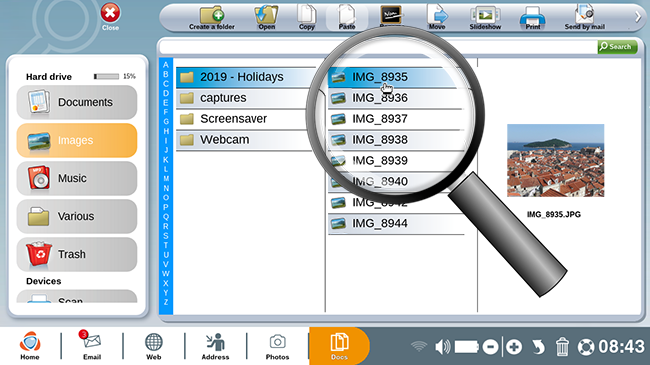
3Access the file containing photos transferred from your camera.
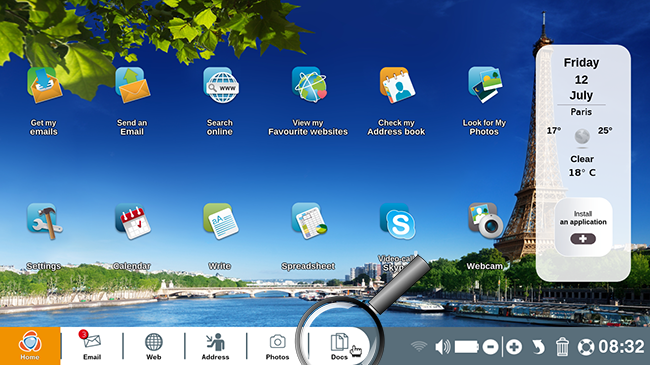
a. Click on "Docs".
From your Ordissimo home screen, click on "Docs".
b. Click on the new directory.
To the left of the window, you should see a new directory entitled "SDORDISSIMO" corresponding to your camera.
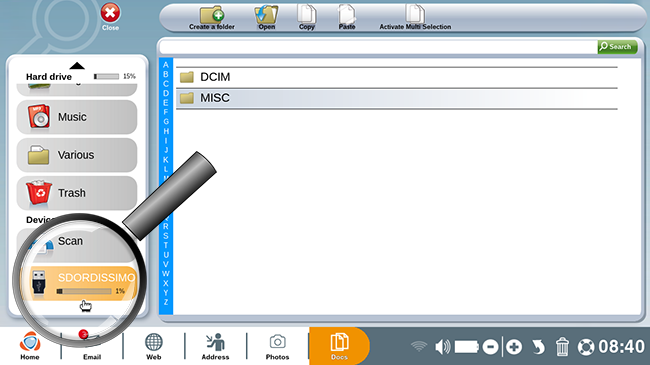
![]() Note that the name of this directory can vary depending on your camera type.
Note that the name of this directory can vary depending on your camera type.
4Find your photos.
a. Click on "DCIM".
Next, click on "DCIM" (this will be the same for all cameras) to find your photos. After doing so, click on the "100CANON" file (this name depends on the brand of your camera and can vary according to your device).
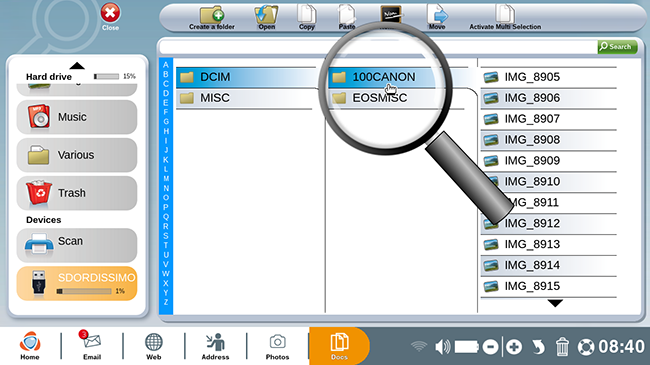
b. Review photos.
In this file you will find vacation photos that you've taken.
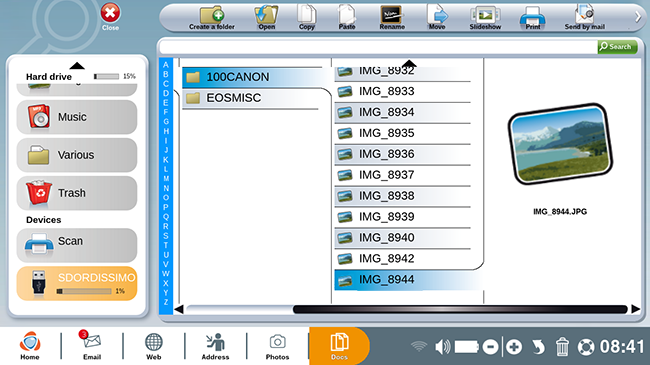
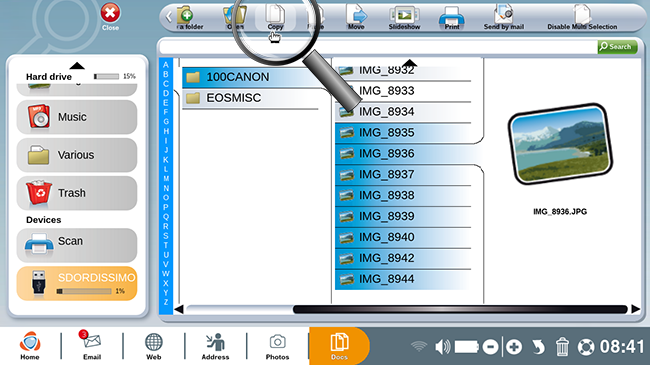
a. From here, select the photos you wish to copy onto your computer.
If you would like to copy more than one photo, make sure to activate the "Activate Multi Selection" option on the toolbar at the top of the screen.
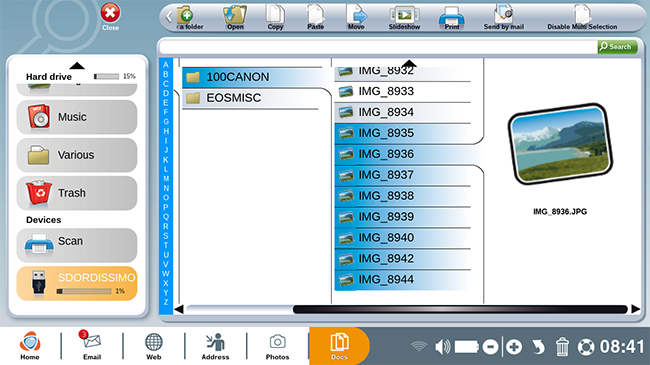
b. Copy the files.
Click on the "Copy" icon to copy your photos.
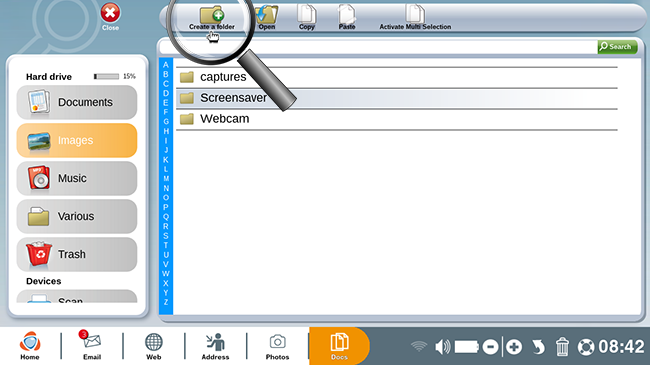
6Save the photographs on your Ordissimo.
a. Click on "Create a folder".
From here, return to your "Images" directory. Say for example that you would like to create a new folder in which to store all of your vacation photos. Click on "Create a folder" at the top of the screen.
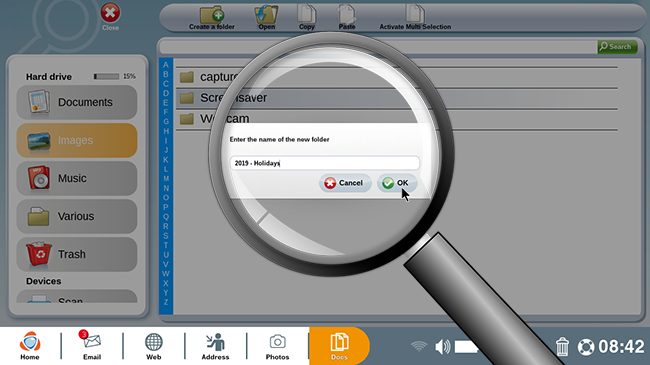
b. Write the name of the "Photos" folder.
A window will appear where you can type in the name of the folder. In this example, you write "2019-Holidays".
A little hint: if you wish to keep your photos in chronological order, start with the year, then month, and finally the title of your folder.
c. Open the new folder.
Here is the newly created folder. Click on it.
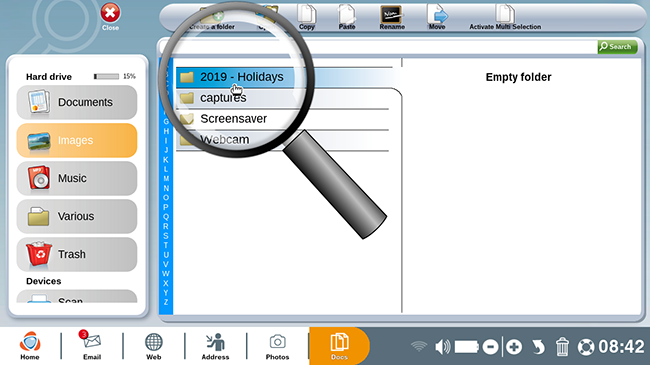
d. Paste the photographs.
Finally, click on the "Paste" key on your keyboard. The photos from your camera will be copied into this new folder.
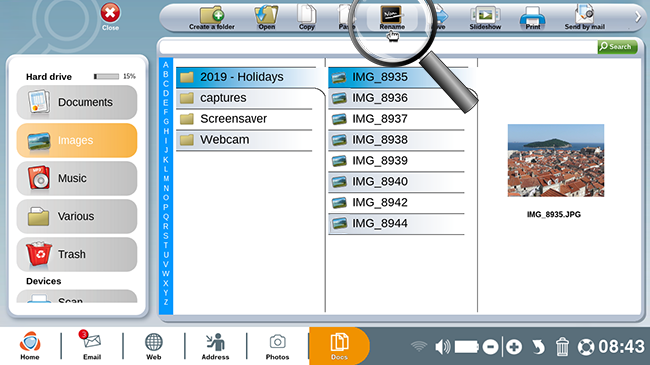
a. Click on "Rename".
Now, you'd like to rename these photographs. To do so, click on a photo then the "Rename" icon at the top of the screen.
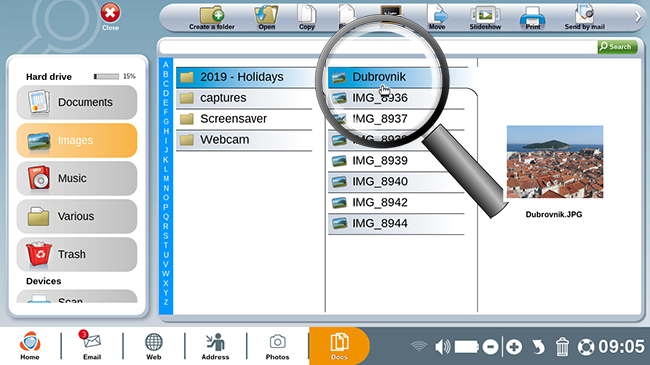
b. Rename the photo.
Now, rename the photo and click "Ok".

c. Updated title.
Your photo was correctly renamed. Now you can do the same for the remaining photos.
 print
print send to a friend