Use a multifunction printer to scan a document - Tutorials Ordissimo (Ordissimo v4)

Together we'll see how to scan a document, a function that has multiple advantages:
- scan a paper document that you'd like to promptly send by email;
- preserve documents by keeping an electronic copy rather than a paper copy which is at risk of fire or water damage;
- have access to your documents anytime and anywhere (for example, you can easily transfer documents onto a USB flash drive);
- archive in a way that eliminates paper and clears up space: create extra space in your home by scanning documents. For certain documents, it is impractical to keep the original paper copy.
Together we'll see how to scan a document in order to save it in the "Docs" application.
Your printer scanner must be connected to your ordissimo via USB cable or with wifi, as explained in the practical guide "How to set up your new printer".
1 Click on your documents.
On the home screen, click on the "Docs" icon on the applications bar.

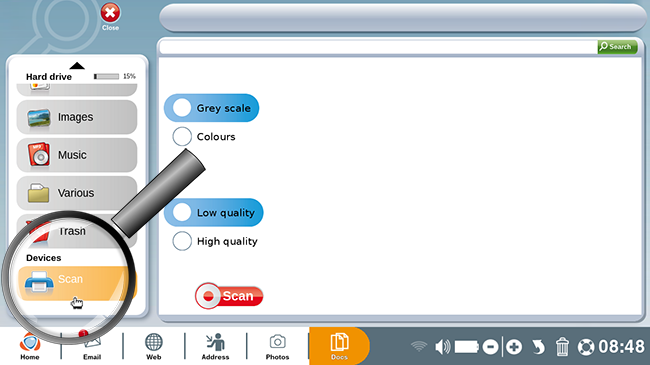
2 Click on "Scanner".
From here, click on the "Scan" directory.
![]() If this directory doesn't appear, your printer scanner most likely needs to be configured. If this is the case, consult the practical guide "How to set up your new printer" for instructions on setting up your scanner.
If this directory doesn't appear, your printer scanner most likely needs to be configured. If this is the case, consult the practical guide "How to set up your new printer" for instructions on setting up your scanner.
3 Position the document for scanning.
Here were are at the scanner home screen.
Place the document to be scanned in your multifunction printer (refer to your printer's user manual for further instructions).
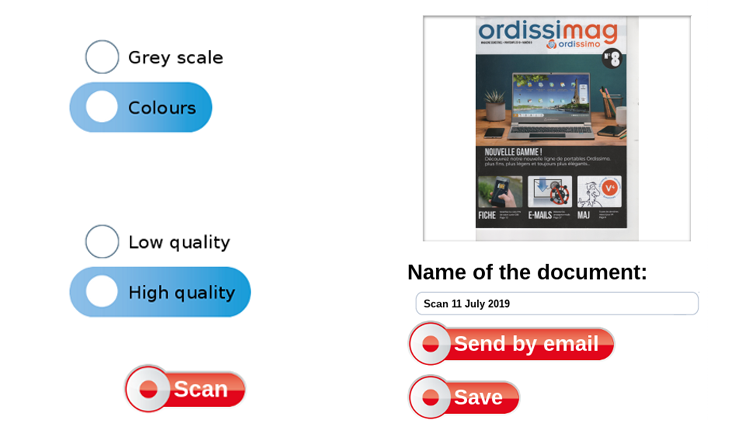
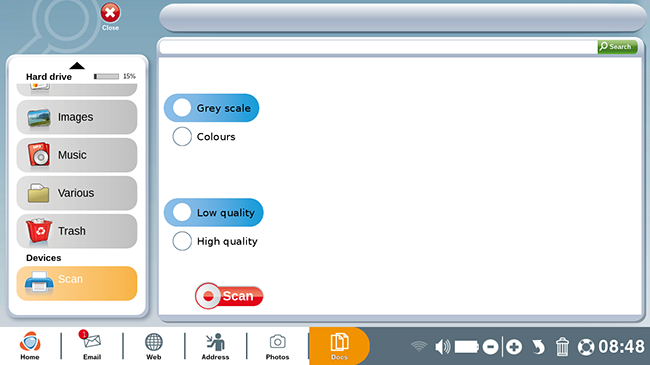
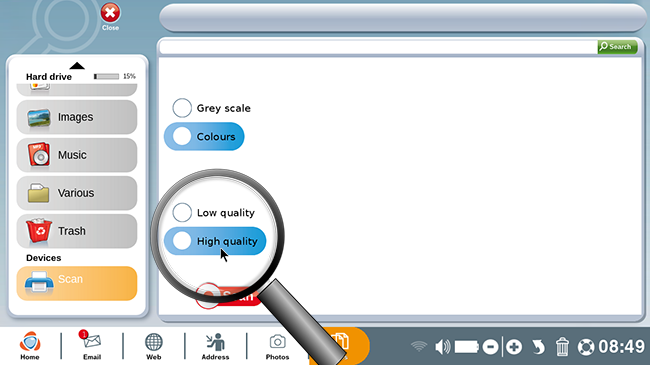
4Choose scanning mode.
Choose to scan your document:
- in black and white (default setting with grey scale)
- in color : click on "Colours"
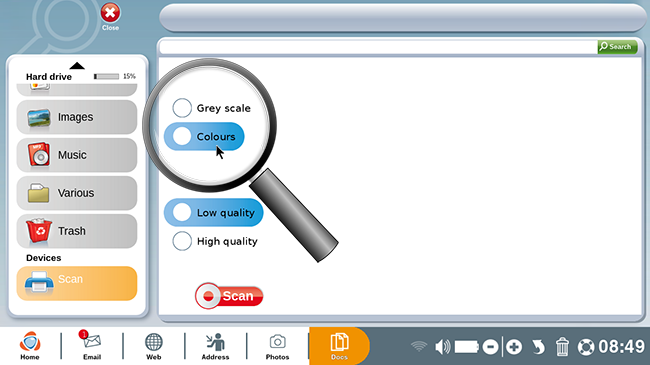
5Choose scanning quality.
Choose to scan your document as :
- Low quality (default setting)
- High quality : click on "High quality"
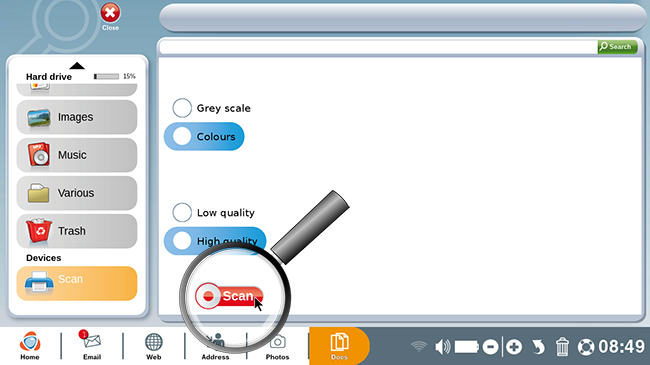
6Begin scan.
a. Click on "Scan".
In order to launch the scan, click on the "Scan" button.
b. Scanning in progress.
A window will appear : scanning is in progress...
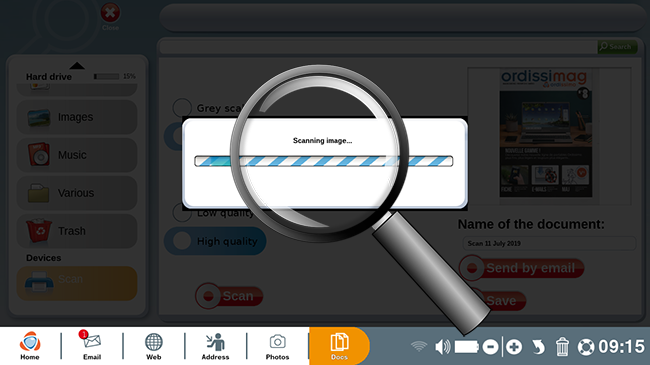
If your scanner is connected via wifi, an initial window will appear indicating that the scanner is connecting to the computer, followed by a second "Scanning in progress" window.
Do not press any buttons as you wait for the scanning process to finish.
7Review the scan.
Once again you are at the scanner home screen.
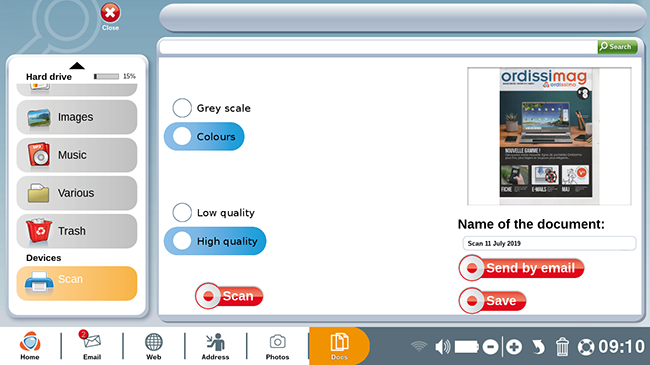
Your scanned document appears to the right.
You can :
- Rename the scanned document (default name is "Scan [day] [month] [year]")
- Send the scanned document by email
- Save the scanned document
8Send a scanned document by email.
a. After clicking on "Send by email", you'll find yourself in the "Email" application.
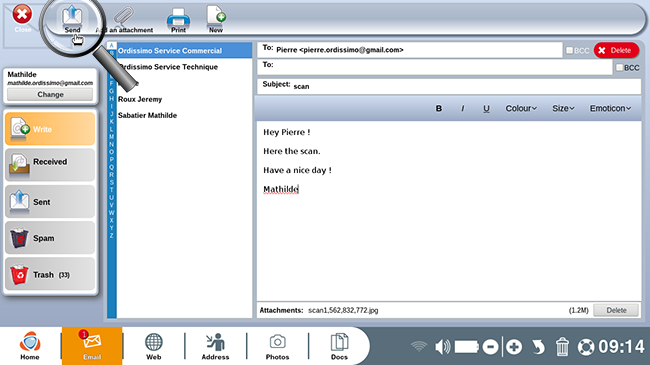
Enter the email address of your desired recipient and your message, then click on "Send" (cf. see the practical guide "How to send an email with an attachment").
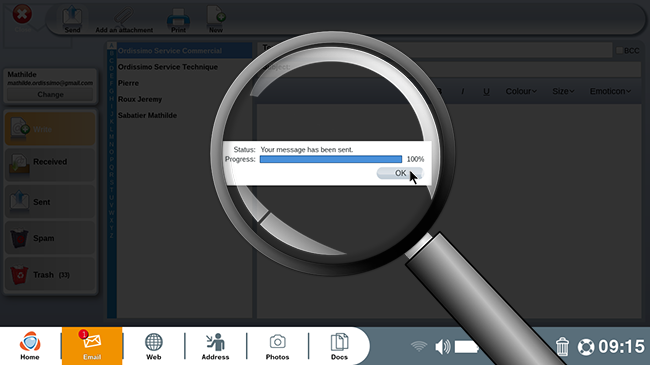
b. A window with the message "Your message has been sent" should open. Click on "OK".
9 Save the scanned document.
After clicking on "Save", a window with the message "The document Scan [day] [month] [year] was placed in Images" will open.
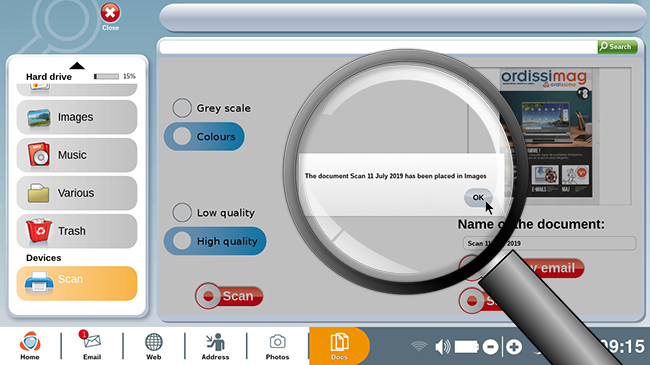
Click on "OK".
This window indicates that the scan was saved in your documents (in the "Images" directory). You can move it to the folder of your choice if you desire.
 print
print send to a friend