
Send a photo by email with the "Photos" application - Tutorials Ordissimo (Ordissimo v4)
Compatibility : 
Level: Introduction
Estimated time: 20'
Let's see together how to rename and send a photograph with the "Photos" application. This practical guide will walk you step by step through the process.
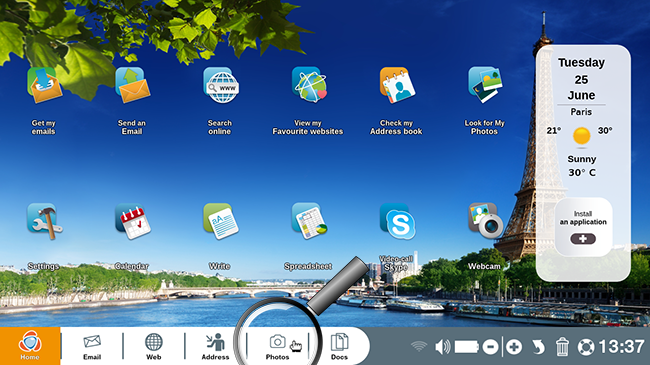
1Open the "Photos" application.
On the home screen, click on the "Photos" application at the bottom of your screen.
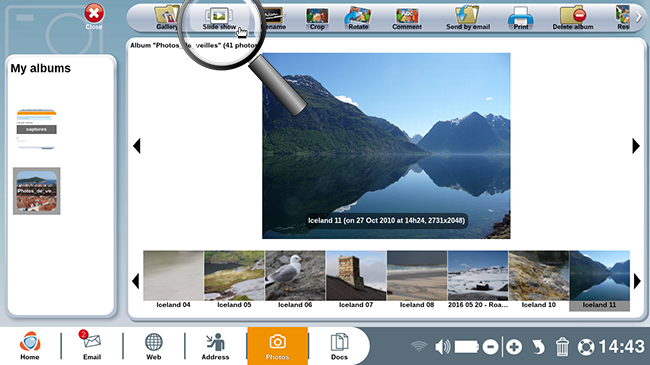
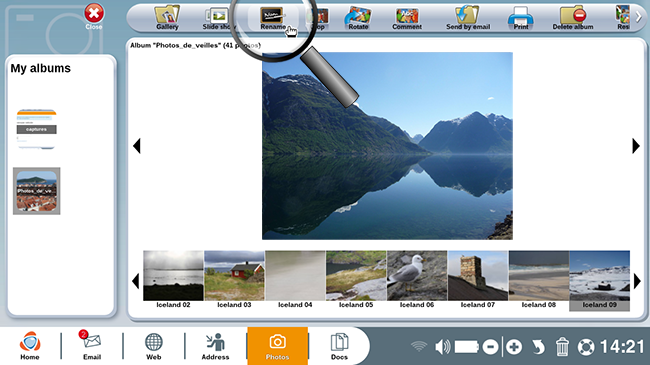
2Select a photograph.
By default, you'll arrive in gallery mode. Click on a single photograph to see the full-sized version.
You can go from one photo to the next by clicking on "Next photo" or "Last photo". You also can switch to "Slide show" mode.
You can return to "Gallery" mode at any time by clicking on the "Gallery" icon at the top of the screen.

3View photos in "Slide show" mode .
a. Click on the "Slide show".
You'd like to see your photos in full screen mode. Click on the "Slide show" button at the top of the screen.
You'd like to see your photos in full screen mode. Click on the "Slide show" button at the top of the screen.
b. Slide show menu.
Once in "Slide show" mode, a menu appears at the center of the screen.
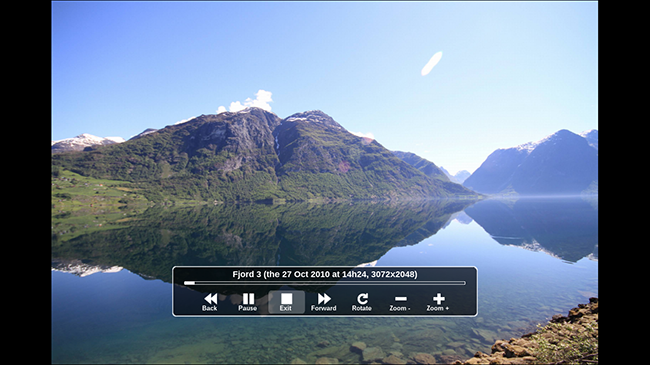
The slideshow progresses automatically and the menu will disappear after several seconds.
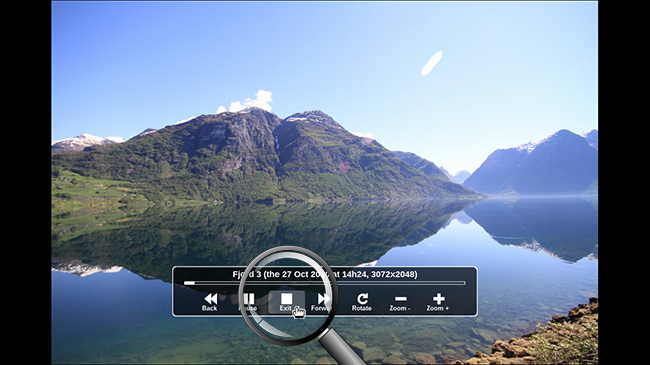
c. Exit "Slide show" mode.
You particularly like a certain photo and want to send it to your friend Pierre by email. To do so, you'll need to exit "Slide show" mode. Place your mouse on the photo and the menu will appear. From here you can click on the "Exit" icon.
4Rename a photo.
a. Click on "Rename".
Now you would like to rename the picture you intend to send to your friend. Once your photo is selected, click on the "Rename" button.
Now you would like to rename the picture you intend to send to your friend. Once your photo is selected, click on the "Rename" button.
b. Write the new title.
A window will appear where you can directly type your intended title and click on "Ok".
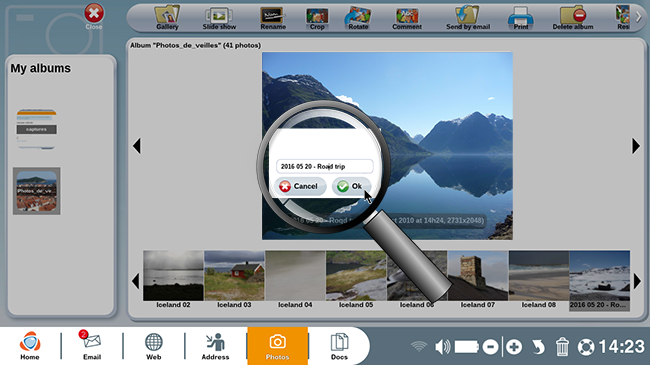
A little tip: To rename the photo, you can mark the date it was taken with the year first, then the month and day followed by your desired title. For example: 2016 05 20 "photo title". Your photos will then be arranged in chronological order.
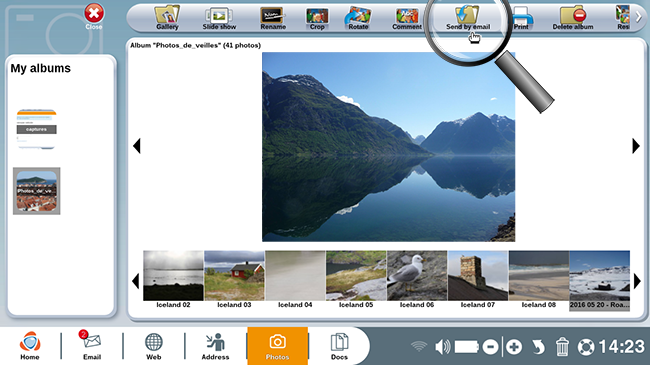
5Send a photo by email.
a. Click on "Send by email".
Now that your photo is renamed, you can send it to your friend by email. To do so, click on the "Send by email" button at the top of your screen.
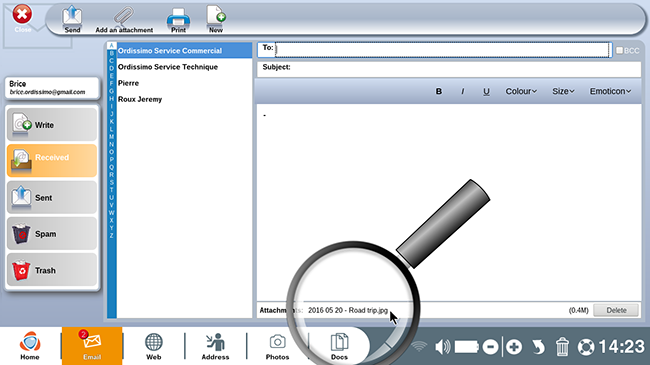
b. Open the "Email" application.
Your "Email" application will automatically open with the selected photo attached. All that's left to do is type in the recipient's email address, fill in the subject and message, then click on "Send" to the top left of the screen.
c. Add more than one photo (optional).
You have the option of adding more than one photo to a single email. To do so, return to step 5a and complete the same process with a different photo. Once all of your photos have been added and your email is ready, click on the "Send" button at the top left of your screen.
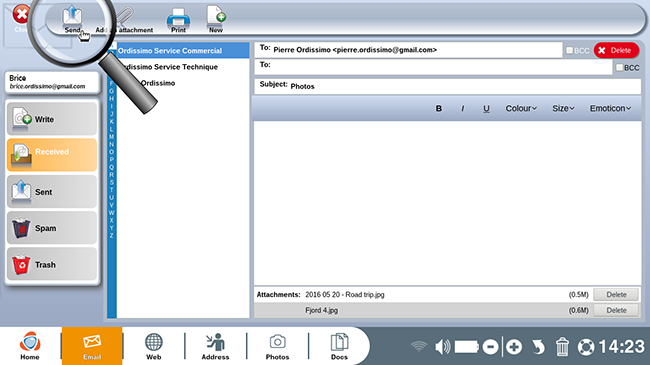
Be careful not to exceed the 5M (5 Mega) size limit in order to ensure that your email arrives successfully in your recipient's inbox.
 print
print send to a friend