Introducing your Email application - Tutorials Ordissimo (Ordissimo v4)

Together we will go through your "Email" application's many functions. To start, you have access to five distinct directories:
- Write (send an email)
- Received (find all received emails)
- Sent (find all sent emails)
- Spam (keeps unwanted emails from reaching your inbox)
- Trash (find all deleted emails)
1Access the "Email" application.
There are three different ways to access your "Email" application from your home screen.
| By clicking on the icon "Send an email" |
OR by clicking on the icon "Get my emails" | OR by clicking on the "Email" icon on the applications bar |
 |
 |
 |
the number of unread emails in your inbox is displayed to the upper left of the "Email" icon.
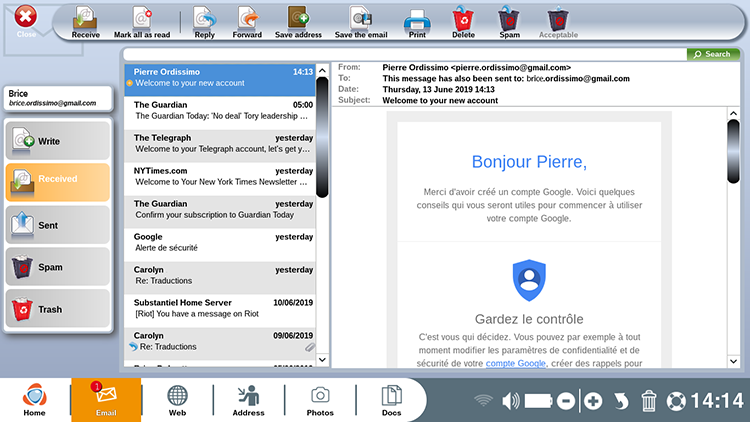
2Received emails.
Once you've clicked on the "Email" icon, your Received directory will automatically appear.
Using our example, notice that the inbox contains one new email (all unread emails are marked by a yellow circle). To see the contents of the email, click on the email highlighted in blue and the entirety of the message will appear to the right.

3How to identify unread emails.
There are two ways to tell an email is unread before you click on it: a yellow circle is displayed to its left and a number encircled in red appears will appear on the Email icon.

After clicking on the email, you'll notice that the yellow circle and red marker on the Email icon disappear.

4"Received" directory menu.

- Receive : click on this icon to check for new emails.
- Mark all as read : in one click, all unread emails will be marked as read.
- Reply : after clicking on and selecting an email, click on "Reply" in order to send a reply to the email's sender.
- Forward : after clicking on and selecting an email, click on the "Forward" icon to transfer it to one of your friends (cf. Practical guide How to forward an email ?).
- Save address : if the sender's email address isn't already saved in your address book, click on this icon to save the address (cf. practical guide Introducing your address book!).
- Save the email : save the email in your documents.
- Print : click on this icon to print the email displayed on the screen.
- Delete : delete the selected email. If necessary, you can retrieve it from the "Trash" directory.
- Spam : inbox containing undesired emails. Some unwanted emails, though a nuisance, aren't dangerous whereas others are part of identity theft schemes or other types of fraud.

Clicking on the "Write" directory allows you to create new emails. Various icons appear on the menu bar:
- Send : Once your email is ready, click on the "Send" icon in order to send it to its destination.
- Add an attachment : add an attachment to your email (cf. practical guide How to send an email with an attachment)
- Print : if you wish to keep a paper trace, you can print an email by clicking on the "Print" icon.
- New : this icon lets you write a new email.
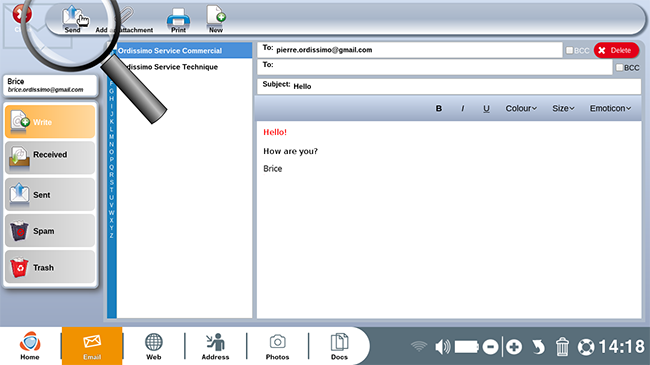
6Writing an email.
a. Filling in the different fields.
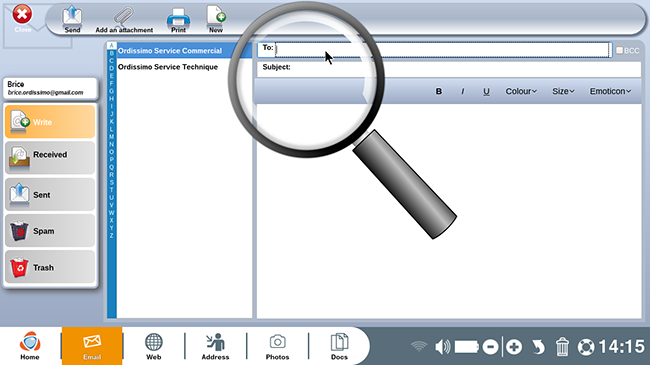
In order to write an email you must fill in multiple fields:
- To : enter the email address of the person to whom you wish to send an email. A new "To" box will appear below , allowing you to enter multiple addresses if you so desire. Checking the CCI box to the right of an email address makes it invisible to other recipients. (cf. Practical guide "How to send an email with a hidden copy recipient (CCI)").
- Subject : write a title for your email.
- Body : write the message you wish to communicate to your recipient(s).
b. Modify the text.
- Stylistic effects can help improve your writing. To use these, select the word(s) you wish to change and click on one of three icons:
![]() : the "B", represents "bold" and will darken selected text in order to add emphasis.
: the "B", represents "bold" and will darken selected text in order to add emphasis.
 : the "I", represents "italics" and will tilt selected text.
![]() : the "U", represents "underline" and allows you to underline selected text.
: the "U", represents "underline" and allows you to underline selected text.
- It is also possible to add various colors by clicking on the
 button. To do so, select the word(s) desired and click on "Colour". A drop down menu will appear with various colour options. In this example, we have chosen to write "Hello!" in red.
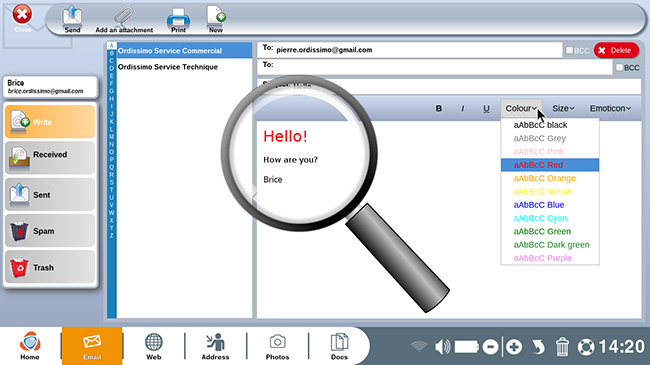
- Clicking on "Size" lets you increase or decrease the size of your font. Once you've clicked
 , a drop down menu will appear allowing you to choose between: very small, small, normal, average, big, or very big.
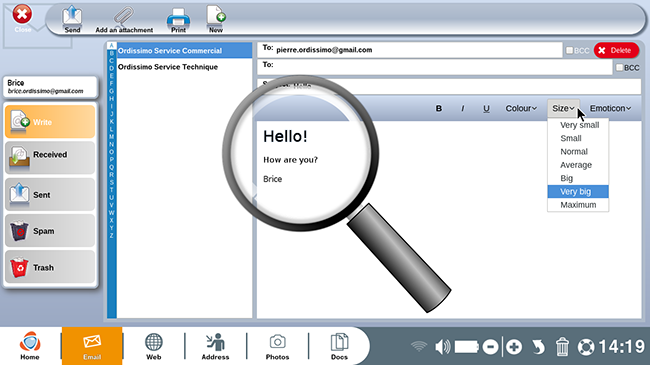
![]() The default font size of your emails is "Average".
The default font size of your emails is "Average".
- Emoticons are an alternative way to express emotion in the body of your email. You're used to seeing them on your smartphones or on social media, and now you can use them in the same way in your emails. Simply place your cursor where you wish to add an emoticon and click on
 . A menu will appear allowing you to select the emoticon of your choice.
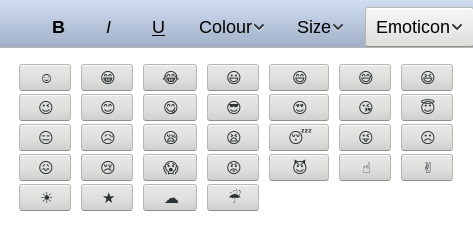
7Send an email.
a. Click on "Send".
Once your email is ready, click on the "Send" icon on the menu bar.
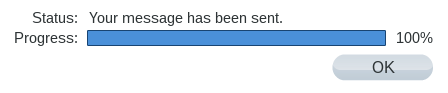
b. Sending in progress.
A window will appear indicating the progress of your outgoing message. Wait for a few moments without touching anything and the message "Your message has been sent" should appear.
In the case where a sent email reappears in your Received folder, make sure that you entered the recipient's correct email address (cf. Practical guide An email that you've just sent comes back to you).
8"Sent" menu.
After clicking on the "Sent" directory, you should see your recently sent email(s). Various information is displayed: the recipient, date and time sent, subject and text of the email.
Six icons appear on the menu bar :
- Receive : click on this icon to check for new emails.
- Forward : after clicking on and selecting an email, click on the "Forward" icon in order to transfer it to someone else (cf. Practical guide How to forward an email ?).
- Save address : if the sender's email address isn't already saved in your address book, click on this icon to save the address (cf. practical guide Introducing your address book!).
- Save the email : save the email in your documents.
- Print : click on this icon to print the selected email.
- Delete: this icon deletes an email and sends it to your "Trash" folder.
 print
print send to a friend